We love spoiling ourselves sometimes and one way of doing that is getting our gorgeous nails all done up at the nail spa salon. We all want to sit down and relax while a nail tech is doing our nails, instead of doing all that work ourselves. At the nail salon, nail professionals usually do a better job than we do at home, especially if you’re new to doing nails.
But in today’s world, due to Covid-19, it is best to prioritize our safety and health first before anything else! Some of prefer not to spend $30-$50 or more for a single mani session, along with other manicure expenses.

If you’re a working student, at-home mom or someone who likes to save and decide to cut down their beauty or manicure expenses, then experimenting with Polish Pops is recommended.
It’s a smart technique to be cost-conscious and buying your own bunch of Dip powder starter kits is a game changer! Rather than buying a single dip powder, why not purchase a starter kit? Always do the math and ask yourself some questions like; does buying individual items cost more than purchasing a kit?
If you want to save money on your manicure but also aim for a good quality then these economical trendy dip starter kits really work on your needs!
We’ll walk you through some ways that can surely help you. It might be a little complicated at the beginning but you’ll definitely get the hang of it.
Setting up
Collect all your manicure supplies and essentials. Be sure to have a sturdy surface that you don’t need to worry about getting a bit messy.
Step 1
Apply the Bond liquid from your dip powder nail kit to your entire nails.
Step 2
Grab the #2 Essential Dip Base bottle in your starter kit, which is the basecoat. You should also prepare the jar of dip powder called Natural, it depends upon what manicure you prefer to do.
Apply a thin even layer of basecoat, about three-quarters of the way down your nail. (Don’t apply all the way to your cuticle.) Once you’ve applied the base, dip your nail into the Natural powder at a 45-degree angle.
Important notes: It’s easier to apply the base and dip one nail at a time. Apply and dip, then repeat.
Once you’re done dipping all of your nails, dust off the excess powders using a dusting fluffy nail brush.
Always make sure your powder is even. However, you might not be able to see much dissimilarity once the Natural layer is applied, it helps prevent any yellowing that might be happening later. This is a very essential thing to remember especially if you pick an all-white or light nail color.

Step 3
Set the jar of powder aside, so it doesn’t mix up with the next powder you’ll be using.
Then, you’ll need to apply the base coat liquid to your nails again. Apply the base coat almost all the way to your cuticle. Dip your nail at a 45 degree angle to your colored powder. Repeat this process each time you apply the base coat to one of your nails.
After you apply your first layer of dip color powder, do these steps again to add another dip color of layer. Adding another layer will make your color look a lot brighter and really pop the color out!
At this moment, you might observe some spots on your nails that are uneven or rough. But don’t worry about that, we’ll work that out in the next following step.
Step 4
Collect your basecoat and recycling system from your dip powder nail kit. The point of the recycling system is to make sure your colored powders and clear powder don’t get mixed together. This clear powder application itself allows you to buff out any defect in your nails without ruining your color.
Apply the base coat again to your entire nail. Dip the spoon from your recycling system into your natural powder also known as clear powder. Place your nail on top of the recycling system and sprinkle the clear powder evenly over your nail. Don’t forget about the sides too. Repeat the same process to the rest of your nails.
Then, always make sure to brush off the excess powder from your hands or nails. Remove the scoop from your recycling system and put any leftover powder back into the jar of clear powder.
Step 5
For this step, grab your essential liquid bottle labeled as Step 3. Apply it to each of your nails. Then, allow a few minutes for it to dry entirely.
Step 6
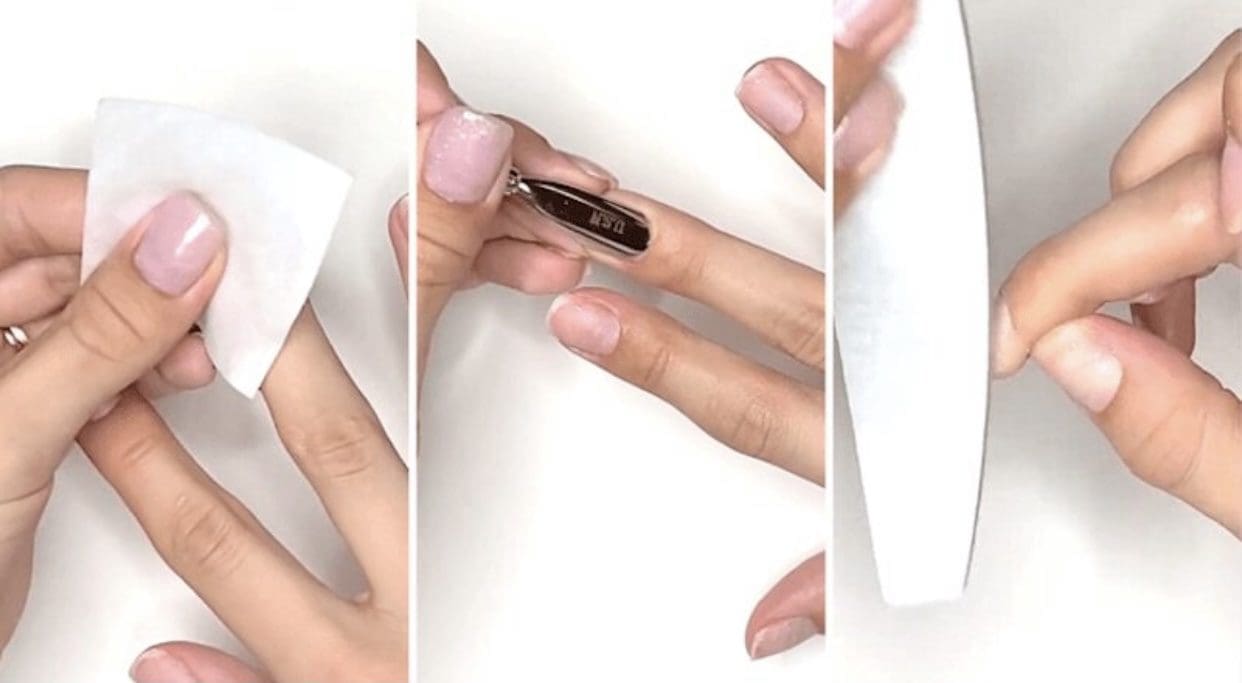
The next step of this at-home dipping powder manicure is buffing and shaping. You can buy a portable electric nail file online that is similar to the ones used by nail professionals, or you can also use a square nail buffer and files if you prefer, or use a combination of all three.
While you’re buffing your nails, focus on the space right above your cuticles. Because once your natural nails grow out, you don’t want to have a big lump there. Thinning and smoothing this area achieves a more natural-looking nail. Please be careful not to overdo or thin out your nails too much in this specific area.
Then, buff out the rest of your nails. The area next to the cuticles and the sides usually are likely to be the roughest.
Once you’re done buffing your nails, time to shape them to your desired shape and likeness.
Step 7
Next, gently wash your hands with water alone to clean away any dirt that’s made from buffing and shaping. Then, use Activator #3 the Drying Liquid and Sealer again for all of the nails. Give it a couple of minutes for the coat to dry. Massage Activator #3 Drying Liquid and Sealer into your nail with a lint-free wipe and make sure it has been well absorbed.
Step 8
Again, apply 2 layers of topcoats.
Tip: Use simple brush strokes. Since this is a fast-drying liquid, put the cap back on quickly — even in between your two hands and maybe between fingers.
And viola, you’re done!
We’ll also be giving 3 useful tips and hacks below to help you save more money and time when doing your manicure.

Tip #1
Invest in a great high-quality best acrylic nail dipping starter kits that’s best for beginners or pro like Double Dip Nail Kits
It is enjoyable to go to your favorite nail salon spa occasionally but, at the end of the day, doing it yourself is way more economical and hassle-free!
At Double Dip Nails, they offer easy-to-use kits for beginners and for nail professionals as well! If you’re on a budget, it’s smart to spend your money on buying an entire bundle of the best sets of at-home nail dipping powders starter nail kits with high-quality and that will not make you bankrupt.
Wanna know more about the buzz?
Double Dip have some detailed blogs posted on their website to carefully help and guide you together with your dipping journey!
Tip #2
Bring your personal dipping nail powders and other manicure essentials to the salon
If you love going to the nail spa, a very common economical and healthy tip would be bringing your own nail manicure essentials with you, such as dipping powders essential liquids and other manicure tools. Have a professional create those beautiful nails for you with the exact color and brand of your choice! No need to worry about contamination or risk of infection from other clients when you’re bringing your own products for your nails. It’s a win-win. It makes it easy for you and your nail tech to take better care of your nails! You can also hoard your own sets of affordable, high-quality dipping powders by purchasing them online. #OnlineShopping is life, especially during this Covid19 pandemic .
Plus, once your manicure chips, you don’t need to revisit and pay for an entirely new session to retouch your manicure. You can surely do it yourself without the need to go back to the nail salon. This is easily done with the help of online tutorials that you can follow and find everywhere with just a simple google search on your phone. This can make your manicure last longer, and of course, saves you time and cash!
Wanna know more about the super affordable best starter kits nail dipping powders in the nail beauty world right now? Check the links below.
List of Polygel Nail Kit With Lamp – Double Dip Nails (doubledipstore.com)
Nail Starter Kit for Beginners For Salon-Worthy Manicure at Home – Double Dip Nails (doubledipstore.com)
15 Best Long Lasting at Home Dip Powder Nail Kits for Beginners – a De – Double Dip Nails (doubledipstore.com)
Tip #3
DIY your manicure anytime at home
Doing your own manicure at home is a definite WIN! Practice makes perfect. You can absolutely surf loads of helpful youtube video tutorials and information on the net. This can definitely help bring you to your utmost potential.
You can be your own nail tech without having any prior experience whatsoever. By getting a simple essential dip powder starter kit, you can save so much time and money by doing your own Manicure or Pedicure at home.
All you need to know first is the basic, affordable yet high-quality nail supplies, tons of patience, a willing heart, time, and effort.
Please make sure to subscribe, so you can be notified whenever there are newly uploaded videos for DIY nail manicure video tutorials best for beginners and professionals.
Click here: Double Dip Nails
Do you want to save up to $1,200 to $2,400 with an All-in-One Nail Starter Kit (up to 35 full sets)? Add to cart now and experience the hassle-free and economical way to achieve a beautiful mani at home!
Go ahead and check out high-quality yet affordable best dipping powder kits that are best for personal use or as a gift!
Give yourself a manicure that looks professionally done with these easy-to-follow tips tricks. Always remember, if others can do it, you can surely do it, too!


